Developer’s Onboarding Guide
Developer Workstation Requirement
1. Developer Workstation Requirements
2. Setting Up the Development Environment
3. Docker setup
4. Maven setup
5. Configuring and start ‘SDK-5’ project
6. Prepare code for transferring to the Client
7. Working with SSL-certificates
8. Suggestion on applying source code patches and new features usage in the development purposes
1. Developer Workstation Requirements
Operating System
Ubuntu Linux operating system is our officially supported OS. This guide contains only recommendations for this OS.
If you want to use another OS, you are on your own. Use this guide as a reference.
|
OS Family |
Notes |
|---|---|
|
Linux |
Ubuntu LTS (22.04) is recommended. |
|
OS X |
If you would want to use Docker, please note that there is no native kernel support for Docker in OS X at the moment. Containers will run in a hardware-emulated environment. |
|
Windows |
Windows 10 with Linux Subsystem is recommended. |
Required Software
2. Setting Up the Development Environment
JDK Installation:
For Linux:
JDK17 LTS: Open JDK 17 | Oracle JDK 17 LTS
For Mac:
-
Download OpenJDK for Mac OSX from http://jdk.java.net/ (for example Java 17)
-
Unarchive the OpenJDK tar, and place the resulting folder (i.e.
jdk-17.jdk) into your/Library/Java/JavaVirtualMachines/folder since this is the standard and expected location of JDK installs. You can also install it anywhere you want in reality.
More details about the installation can be found at https://java.tutorials24x7.com/blog/how-to-install-openjdk-15-on-mac
To correct build and start a project with Java 17, for IntelliJ IDEA, you need to install the last version IntelliJ Lombok plugin – 0.33 !
GIT Installation and Configuration
Checklist:
-
Install Git and Git flow packages
-
Configure Git environment
-
Generate your SSH keys
-
Install your SSH public key into your GitLab account
For Linux:
Ubuntu Linux usually comes with Git pre-installed. Otherwise, use this command:
sudo apt install git git-flow
For Mac:
There are several ways to install Git on a Mac. In fact, if you’ve installed XCode (or it’s Command Line Tools), Git may already be installed. To find out, open a terminal and enter git --version.
Otherwise, the easiest way to install Git on a Mac is via the stand-alone installer:
-
Download the latest Git for Mac installer.
-
Follow the prompts to install Git.
Configure Git environment:
git config --global user.name "<your name>"

git config --global user.email <your e-mail>
To work with our GitLab, you will require to have your own key pair. It is used for authentication when using SSH transport.
If you already have one, you can use it. Otherwise, generate your key pair using:
ssh-keygen -t rsa -b 2048 -C "email@example.com"
Configure your GitLab account:
-
Navigate to https://git.<your profile Name>/profile/keys
-
Put contents of
~/.ssh/id_rsa.pubfile into the “Key” field
DBeaver
DBeaver is a database management tool.
For Linux:
Add DBeaver repository to your Debian / Ubuntu by running the commands below:
wget -O - https://dbeaver.io/debs/dbeaver.gpg.key | sudo apt-key add -echo "deb https://dbeaver.io/debs/dbeaver-ce /" | sudo tee /etc/apt/sources.list.d/dbeaver.list
After adding the repo, update the apt list and install DBeaver CE:
sudo apt update

sudo apt -y  install dbeaver-ce
For Mac:
The installer distribution is the recommended way to install DBeaver on MacOS X. It contains all required dependencies. Besides this, the installer automatically upgrades DBeaver to the new version, if a previous version is already installed.
Installer for Mac available on – https://dbeaver.io/download/
Postman
You can install Postman on Linux via the Snap, using the command
snap install postmanAccept invitation in email
Docker & Docker Compose
Full information on installing Docker and Docker Compose for different platforms is available on the official page https://docs.docker.com/engine/install/
3. Docker setup
For Linux:
docker login
docker login <Name of your subaccount>
and use credentials
Add to idea docker integration data: (for docker run tasks)

For Mac:
docker login <Name of your subaccount>and use credentials:
developer / (password from admin)Put the next string into /etc/hosts:
172.17.0.1 local.sdk.finance host.docker.internal4. Maven setup
4.1. Install the maven
https://linuxize.com/post/how-to-install-apache-maven-on-ubuntu-20-04/
4.2 Create settings.xml
Find ~.m2 directory and put settings.xml here. (replace {login} and {password} with ldap credentials)
4.3 IntelliJ IDEA plugin for maven
To resolve Transitive Dependencies collisions
Maven Helper – IntelliJ IDEs Plugin | Marketplace
5. Configuring and start ‘SDK-5’ project
5.1 Create a folder for projects
Create a folder for projects if it does not exist
In Terminal (Ctrl + Alt + T) run
mkdir ~/projects5.2 Obtain project from the repository
5.2.1 Create a folder for the project if it does not exist
In Terminal (Ctrl + Alt + T) run
mkdir ~/projects/core5.2.2 Open project in IDE
‘Core’ project repository
https://git.<your repository>Clone → Clone with SSH → Copy URL
Launch IntelliJ IDEA → Get from Version Control
Choose ‘Version control’ Git, paste the copped URL into ‘URL’ and input into ‘Directory’ the project folder path
e.g.
URL:<link to your Git repository>

Directory: /home/username/projects/core
Clone
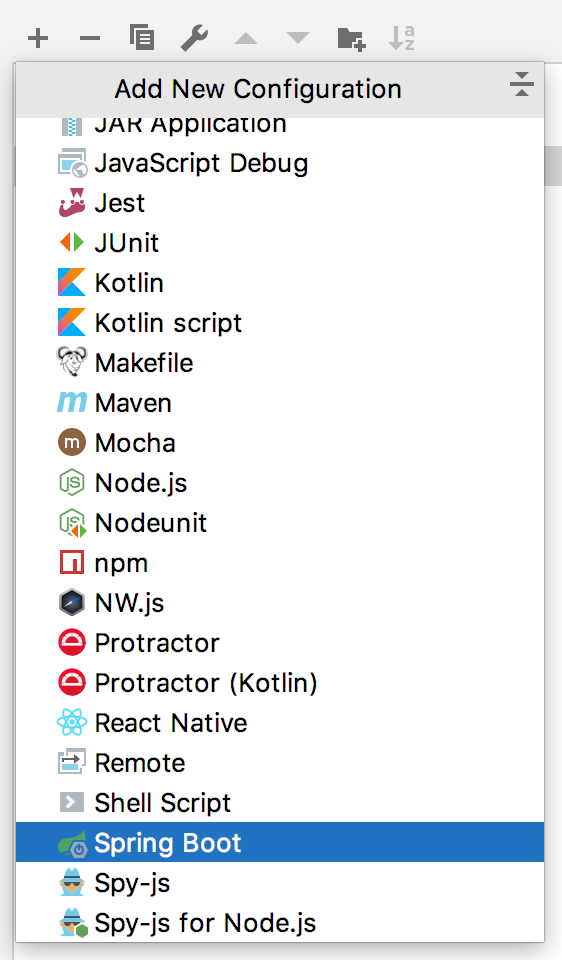
5.3 Build Run/Debug Configurations
- Create Spring Boot
2. Use for Main class – sdk.finance.SdkFiveApplication
5.4 Run project
5.4.1 Start project databases
For start project databases:
-
In Terminal run command
docker-compose up -dfrom project directory -
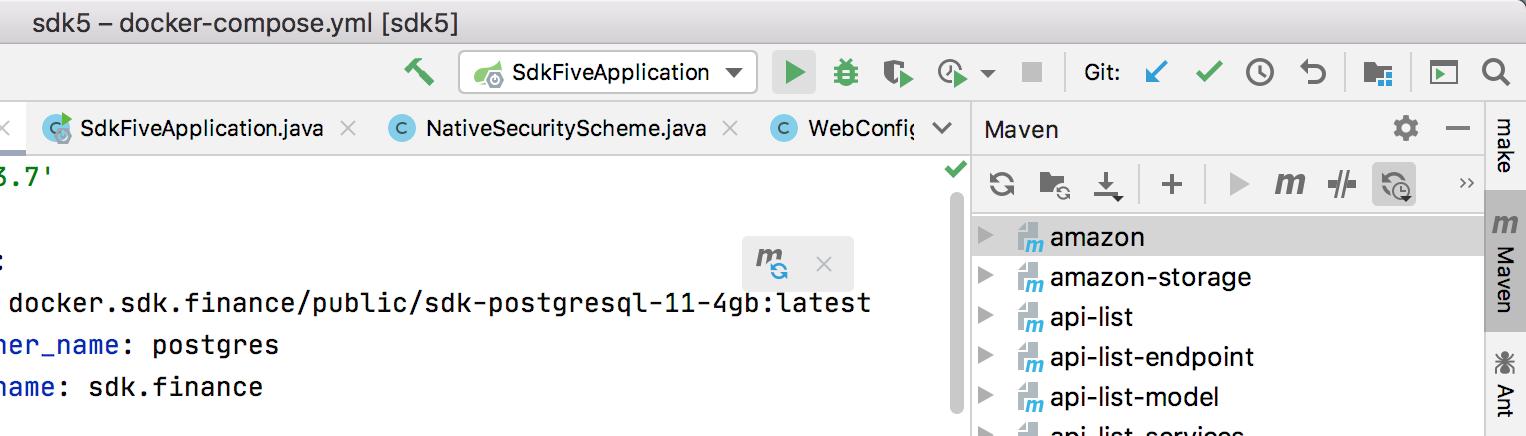
In IntelliJ IDEA:
-
Open the docker-compose.yml file.
-
Click in the gutter.
This creates a Docker Compose run configuration, which starts databases in containers as the db services.
5.4.2 Compile the source code of the project
To compile the source code of the project run
mvn clean compile 5.4.3 Run project
You can use the previously created Run/Debug configuration to run the application.
Click the button Run to create a project configuration.
Or open in IntelliJ IDEA Main class: SdkFiveApplication and click the button Run opposite the class definition

5.4.4 Switch to JDK17
-
Download and install JDK17 on your local machine
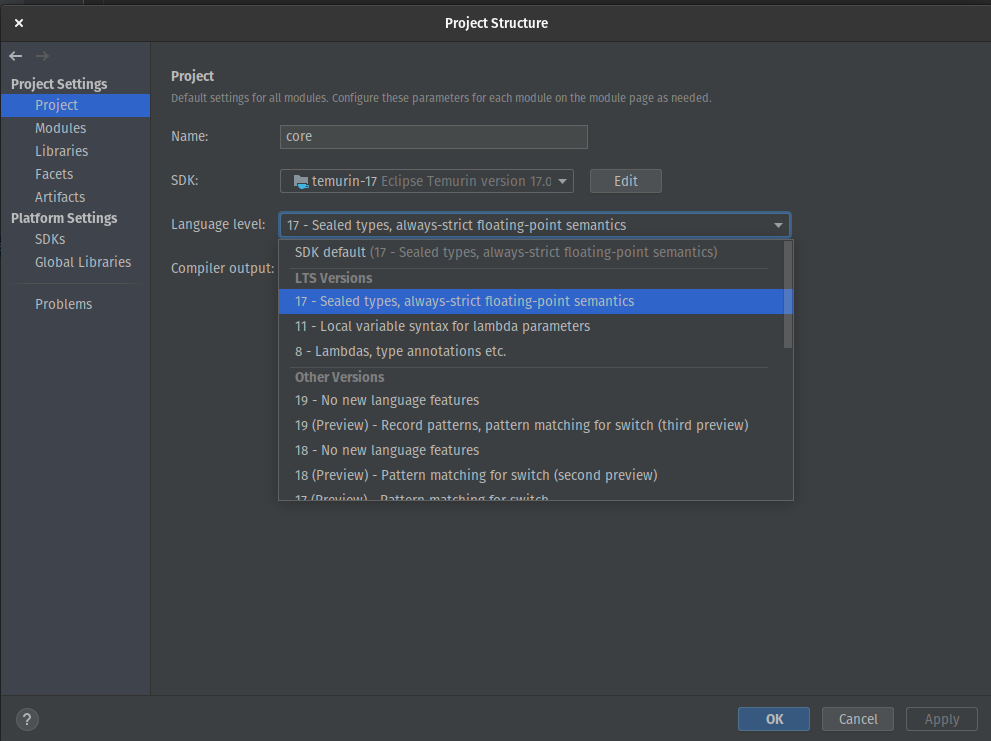
In IntelliJ IDEA:File→Project Structure…
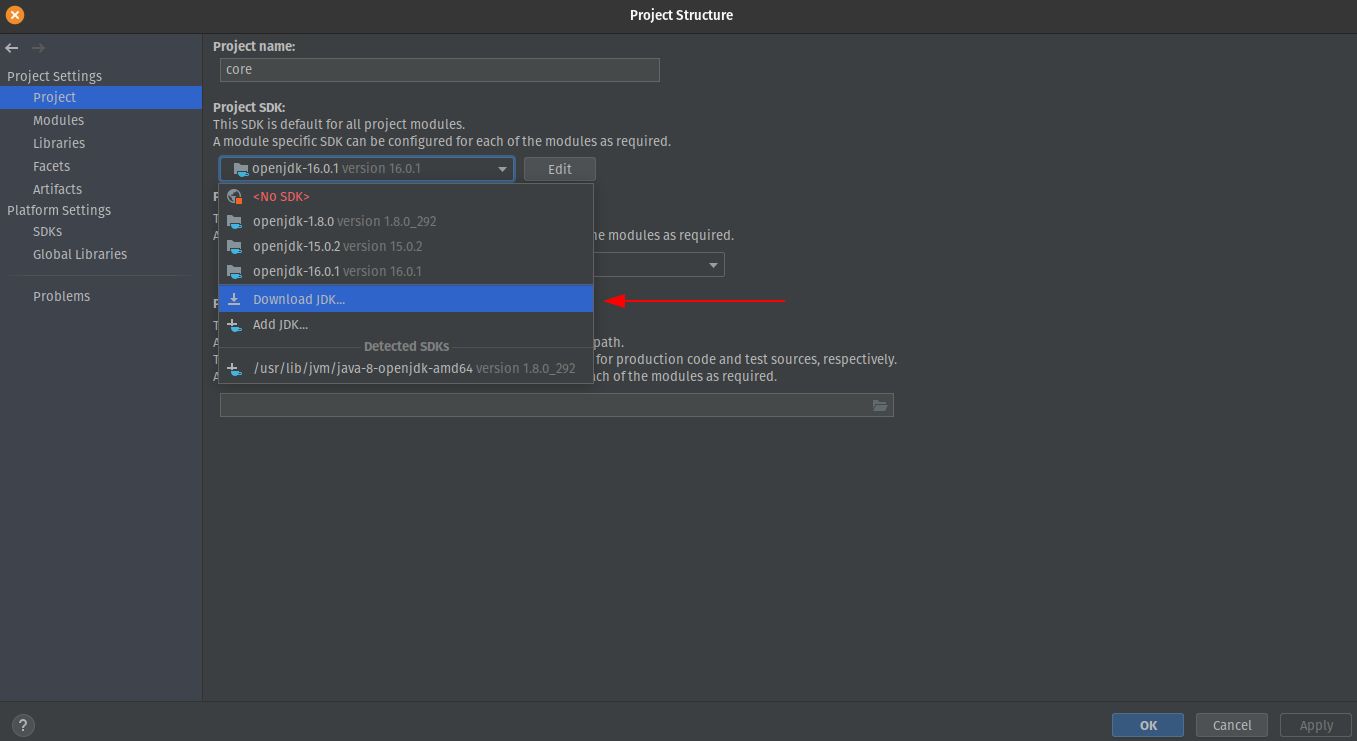
Set JDK version
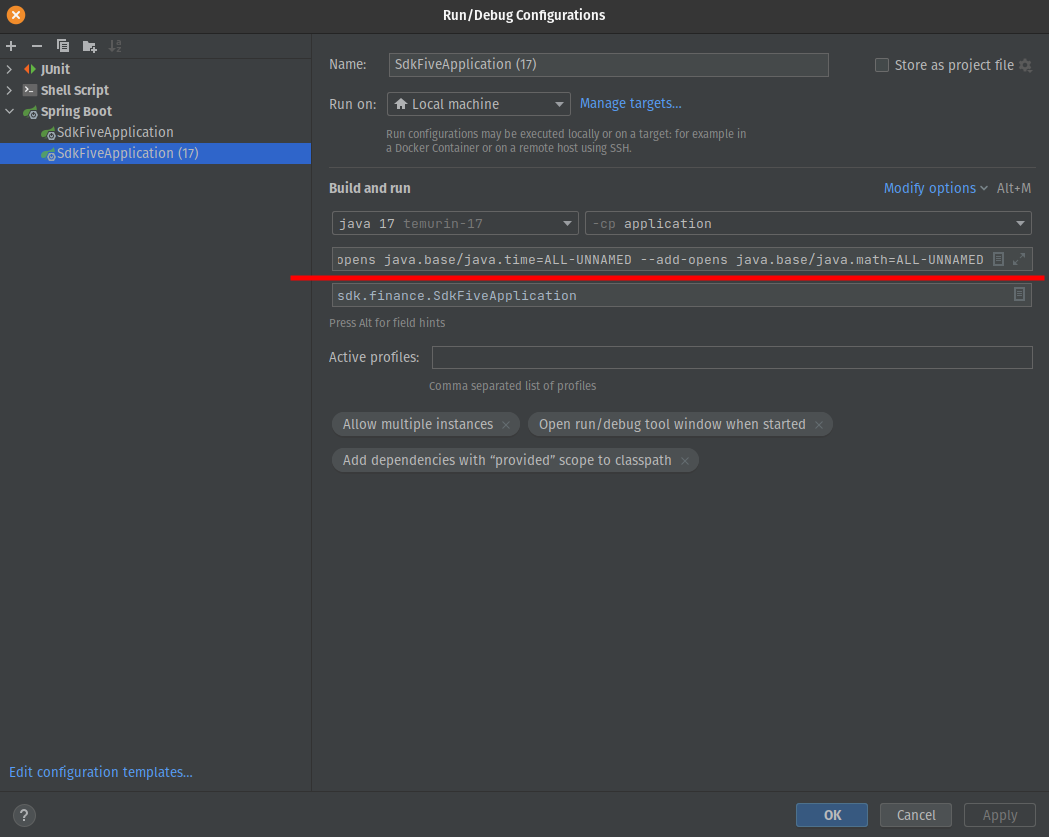
2. Set up project Run Configurations in IntelliJ IDEA
add to VM options:
--add-opens java.base/java.lang=ALL-UNNAMED --add-opens java.base/java.time=ALL-UNNAMED --add-opens java.base/java.math=ALL-UNNAMED
by default spring.profiles.active=dev
To run an application:
To run Tests:
in VM Options:
--add-opens java.base/java.lang=ALL-UNNAMED --add-opens java.base/java.time=ALL-UNNAMED --add-opens java.base/java.math=ALL-UNNAMED -Dspring.profiles.active=test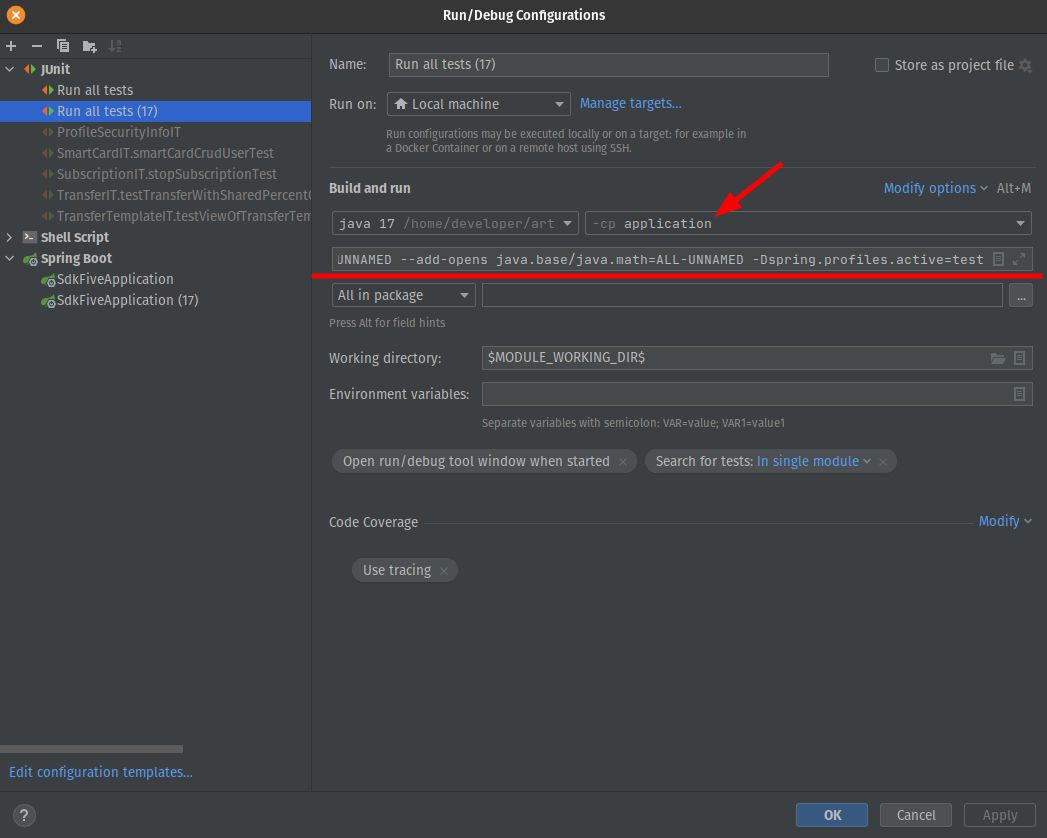
6. Prepare code for transferring to the Client
6.1 Maven repository .m2 is empty
6.2 Put custom libraries into a local Maven repository
6.2.1 Download lib file
lcl-core-2.0.0-RELEASE.jar
6.2.2 Run the command to put the lib into the repository
Execute the command to put the file lcl-core-2.0.0-RELEASE.jar into the local Maven repository (by default is ~/.m2/repository)
mvn install:install-file -Dfile=./lcl-core-2.0.0-RELEASE.jar -DgroupId=sdk.finance -DartifactId=lcl-core -Dversion=2.0.0-RELEASE -Dpackaging=jarwhere -Dfile=<path-to-file>
Repeat the same action for lib sdk5-openapi-2.0.1.jar
all details look at maven specification Guide to installing 3rd party JARs – Maven
6.3 Compile the project
run the maven command to pull all required dependencies from the maven central repository and then compile the project
mvn clean compileThe whole process should take approximately 10 min. (look at the image) and the size of the .m2 folder should be approximately 208 Mb.
6.4 Set up and run application
6.4.1 Run docker containers
docker-compose -f docker-compose.yml up -d6.4.2 Install JDK17
6.4.3 Run the project
VM options should be:
--add-opens java.base/java.lang=ALL-UNNAMED --add-opens java.base/java.time=ALL-UNNAMED --add-opens java.base/java.math=ALL-UNNAMED6.5 Generate JavaDoc
run the maven command to generate JavaDoc
mvn -X clean javadoc:aggregate-jar7. Working with SSL-certificates
There is a special configuration part in application.yaml that is responsible for traffic encryption:
server:

  ssl:

    enabled: true

    key-store: classpath:keystore.p12

    key-store-type: PKCS12

    key-store-password: 1234

    key-alias: mykey
Here is a brief explanation of each parameter:
-
enabled – enable or not the traffic encryption. In case of false, all other parameters can be omitted
-
key-store – location and the name of the key-store file that will be used for the traffic encryption.
By default, it is included in the app andclasspath:is used to define the location.
Key-store location in the project path is/base/core/core-services/src/main/resources/keystore.p12
To use different locations outside the app a full path with the file name should be provided. For example, /opt/sdk/security/keystore.p12.
We recommend storing this file in a different directory from the application. -
key-store-type – the type of the key-store. We recommend using PKCS12 as it’s easier to maintain them.
If you want/need to use another type of storage, you can refer to the official Spring documentation. -
key-store-password – The password for the key-store.
-
key-alias – The alias of the key inside the key store.
7.1. Create a key-store
To generate a .p12 file from a private key (.key) and a public certificate (.crt), you can use the OpenSSL command. Here is an example:
openssl pkcs12 -export -out keystore.p12 -inkey private.key -in certificate.crt -name "mykey"Explanation:
-
-export— indicates the creation of a.p12file. -
-out output.p12— the name of the output file that will be created. -
-inkey private.key— the path to your private key. -
-in certificate.crt— the path to your public certificate. -
-name "mykey"— the alias name you want to assign to the certificate in the.p12file.
When you run the command, OpenSSL will prompt you to set a password to protect the .p12 file.
If you also need to include a certificate chain (e.g., intermediate certificates), add the -certfile option:
openssl pkcs12 -export -out keystore.p12 -inkey private.key -in certificate.crt -certfile chain.crt -name "mykey"7.2. List aliases in the key-store
To list the available aliases in a Java KeyStore (.jks or .p12 file), you can use the keytool command provided by the JDK. Here’s how you can do it:
keytool -list -keystore <keystore-file> -storepass <store-password>Explanation:
-
-list— tellskeytoolto list all aliases in the specified keystore. -
-keystore <keystore-file>— path to the keystore file (for example,keystore.jksorkeystore.p12). -
-storepass <store-password>— the password for accessing the keystore.
For example:
keytool -list -keystore keystore.p12 -storetype PKCS12 -storepass mypassword8. Suggestion on applying source code patches and new features usage in the development purposes
-
After receiving the source code, create new separate branches:
-
initial_source_code– for applying patches from SDK. -
set of branches for development and production.
-
-
After receiving the patch file
4.24.1-patchcreate a new branch frominitial_source_codebranch with a certain name (e.g.,release_4.24.1)
and then apply the patch to this new branch. -
Merge this branch
release_4.24.1intoinitial_source_code. -
Read release notes related to the patch.
-
Choose an appropriate feature in the updated
initial_source_codebranch. -
Copy the code related to the selected feature and paste it into a development branch.